3 Steps to Complete PMP Application: A Comprehensive Guide
The Project Management Professional (PMP®) certification is globally recognized and respected in the project management field. With 1.4 million PMP® holders worldwide, earning this credential boosts your career significantly, as PMP® holders earn 16% more globally and 32% more in the USA than their non-certified counterparts. In this guide, we’ll break down the 3 essential steps to complete your PMP application, ensuring a smooth and successful process.
Step 1: Academic and Professional Education
Academic Education
Before you dive into the PMP® application, ensure you meet the basic education requirements. Follow these steps to provide your academic background:
- Visit https://certification.pmi.org/launch/application/pmp
- Log in using your PMI® credentials.
- Provide details about your highest level of education.
Professional Education
To be eligible for the PMP® exam, you must complete 35 hours of project management education. If you’ve attended a pre-approved PMP® prep course, your 35 hours of professional education will automatically appear in your application—no audit needed. You’ll also receive a certificate featuring the PMI® logo as proof.
If the system doesn’t display your education credits, you can manually input the following details:
- Course Title: PMI Authorized PMP Preparation Course
- Provider Name: IMT-PM (The full name will auto-populate after typing “IMT”)
- Qualifying Hours: 35
Step 2: Project Management Experience

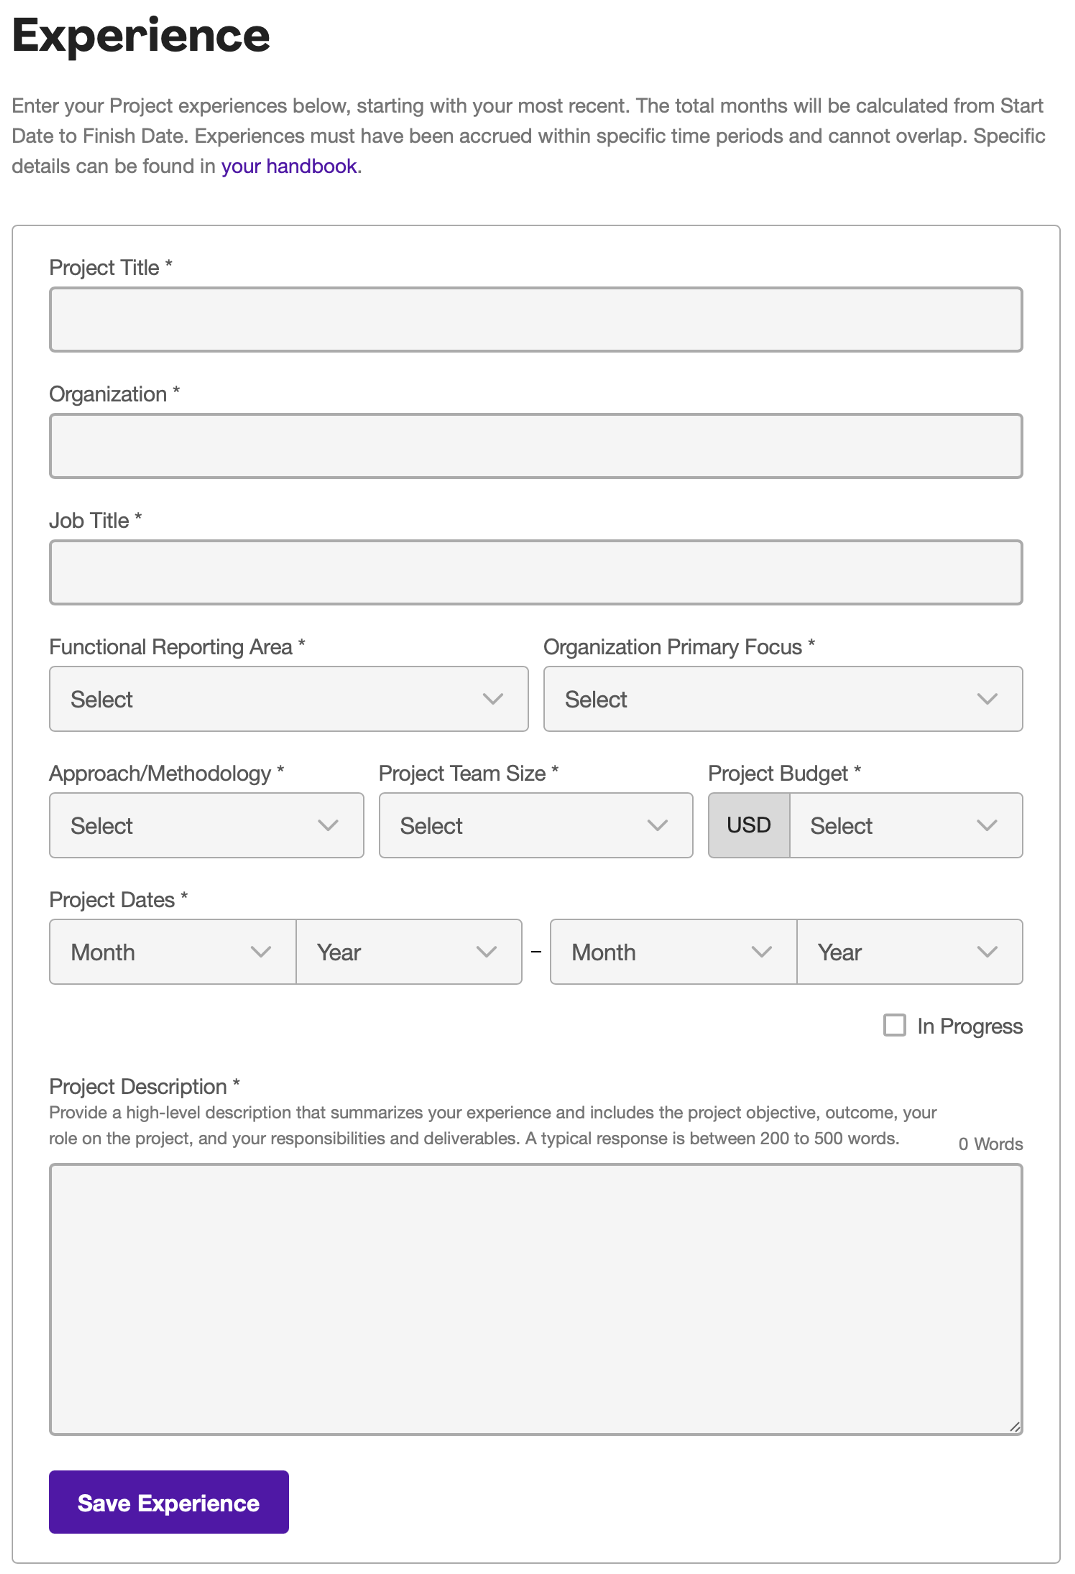
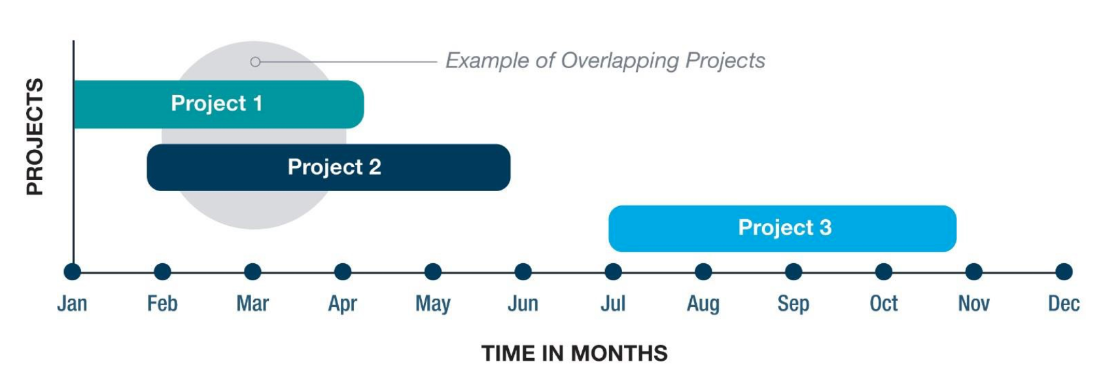
Enter minimum 36 months unique non-overlapping professional project management experience.
Writing a Project Description in “PMI® Speak”
When filling out your PMP application, you’ll need to describe your project experience. Writing in “PMI® Speak” is essential—this means using PMI®-approved language and focusing on specific project management processes. Ensure your descriptions are between 200-500 words and cover these key components:
1. Project Objective
Clearly state the goal or main deliverable of your project.
2. Your Role & Responsibilities
- Initiating: Describe your role in the early stages, such as performing stakeholder analysis or creating the project charter.
- Planning: Outline how you contributed to defining milestones, deliverables, and success metrics.
- Executing: Highlight your leadership role in guiding the team and ensuring communication.
- Monitoring & Controlling: Explain how you supported the team and addressed performance challenges.
- Closing: Summarize the final steps you took to close the project, including reviewing lessons learned and receiving approval of deliverables.
3. Project Deliverables
List the key results or outcomes of your project, such as systems implemented, documentation completed, or training materials delivered.
Step 3: PMP® Exam Fee & Big Day
PMP® Exam Fee
The PMP® exam fee varies depending on your PMI® membership status.
- PMP® Exam fee for PMI® members: 284 USD
- PMP® Exam fee for Non-members: 575 USD
Since the PMI® membership fee is 109 USD annually, you can save about 30% on your exam fee with a membership. PMI® members also gain access to valuable resources, including the PMBOK® Guide and Agile Practice Guide.
Choosing Between Online Proctored Testing and Test Center Exam
You have two options for taking the PMP® exam: Online Proctored Testing or at a physical test center. Each option has its pros and cons, and the best choice depends on your preferences and circumstances.
1. Online Proctored Testing
Advantages
- Convenience: Take the exam from home or any quiet location, saving travel time.
- Flexibility: Schedule your exam at a time that suits you.
- Comfort: You’ll be in a familiar setting, potentially reducing test-day anxiety.
Disadvantages
- Technical Issues: There’s always a risk of internet or software malfunctions.
- Distractions: It might be hard to maintain focus with possible home interruptions.
- Restrictions: You cannot use physical writing tools like paper or pens, which may affect how you work out answers
2. Test Center-Based Exam
Advantages
- Controlled Environment: You’ll have a stable internet connection and approved setup.
- Permitted Materials: Scratch paper and writing tools are allowed for making notes and calculations.
Disadvantages
- Travel: You’ll need to commute to and from the testing center, which can be time-consuming.
- Limited Availability: Test centers may have fewer slots, so early booking is necessary.
- Potential Distractions: Noise from other candidates or the testing environment could affect your concentration.
Consider factors such as your comfort with technology, travel flexibility, and preference for exam-day support when making your decision. You can always reschedule your exam up to 48 hours before the scheduled date.
Conclusion
Completing the PMP application process may seem complex, but by following these three steps—submitting your educational background, writing a strong project description, and preparing for the exam—you can position yourself for success. The PMP® certification not only validates your expertise but also provides substantial career and salary growth. Take your time in preparing, and remember, earning this credential is a major achievement that can greatly impact your professional journey.
Feeling Nervous or Stressed About Your Upcoming PMP® Exam? You’re not alone. We’ll make sure you feel confident about your PMP® exam day.
Explore our PMI® Authorized PMP® Exam Prep training!
Let’s pass PMP® Exam easily by studying PMI® Official Course!


